Tuesday, December 30, 2014

Scarfing the chine

29 December 2014

Scarfing the chine.  A line only a boat builder would ever utter.  I've never done any scarfing, but a little reading suggested that a 1:8 ratio was right.  I have a 3/4 inch thick fir chine, so I made the cut 6 inches on my band saw.  The edge of the chine is quite narrow, so I clamped a 2x4 on before cutting it.


Epoxying the two pieces for the port and starboard chines.


Glue up the hog

28 December 2014

On to the hog.  When I first got the plans, I had to look up just what the hog is.  Now I can describe just what the hog is to just about anyone regardless of their boat building experience.  The hog has two parts: a 1/2 inch plywood layer and a 1" by 5" Douglas fir piece.  Together they run the length of the bottom of the boat.  I rough cut the fir to fit the plywood pieces I got with the kit.


Gluing the plywood portion of the hog.


The portion of the stem that will underlie the inner stem.


I put blocks at each station to support the hog.


Using the image I saw in the plans, I added an piece to transform to hold the hog.


The hog clamped in place to the stations.  Running from stem to stern.


The photo below shows the blocks I added to the edge of the stations that I'll use to hold the chines.


A close up of the stem dry fit.


Grind the stem

27 December 2014

When I first read the plans, the grinding of the stem looked like an easy place to screw up.  I bought an angle grinder last week and a few sanding disks.  The angle grinder made a huge mess, but the job did not take very long and went forward without a hitch.  in the end, my inner stem looked remarkably like the images in the plans.  


The 60 grit disk on the grinder.


Part of the mess I made.  I wished I had done this outside (it was barely above freezing).  It took me longer to vacuum up the shop than it did to grind down the stem.  I left the bottom of the inner stem largely intact as directed in the plans.


The finished product.


The inner stem always looked bigger in the pictures than in person, so I've put a one foot rule in this picture.


The plans call for 3 or 4 coats of epoxy.  I've put two on the inner side, but need to add a couple more.


First issues

26 December 2014

I didn't get anything done on the boat Christmas day, but I've made lots of progress in the last week.  First time I've fallen behind between the build and the blog.  That's a good feeling actually, as it means I'm spending more time in the shop than on the commuter rail.

I ran into my first issue with the pre-cut kit.  The plans and the written description clearly have the hog lying in a plane.  The molds on the kit however clearly put the 3' station about 3/8 inch too low relative to the line defined by all the other stations.  That is when the bottom of the cutout on the mold is seated on top of the pre-cut ladder.

 I moved the 3' station up (towards the hog) until the top of the station was in alignment with the other stations.  Having since done a dry fit with the inner stem, I think moving up the 3' station was the right thing to do.  You can see the resulting gap between the 3' station and the ladder below.


time for some hard wood


24 December 2014

I finally got to Woodsmiths yesterday for the hardwood needed for the chines and the hog.  They had both straight grain fir and Honduran mahogany.  I chose the fir.  The folks at Woodsmiths were great and got the rough wood cut up in a couple hours even though it was Christmas eve.  They're located in Falmouth, right across the street from Falmouth Lumber.  Their selection of hardwoods is amazing.  The fir was only 16 foot long so I will have to make a few scarf joints.  The grain looked great.  I had some photos of the wood showing the grain, but they somehow got deleted.  The total cost was $343, but that included a some extra from the rough cut that I'll use somewhere else on the boat.  I suspect the bill for hardwoods will be ~$1000 before I'm done.


Tuesday, December 16, 2014

Attaching the transom to the mold

16 December 2014

A modest amount of progress last night.  I got all the clamps off the transom.  I learned by the flinch method that epoxy makes for a very sharp edge.  So far I have contributed blood and sweat.  Not aware of any tear-inducing errors to date, but it's early and goofs made now may not be apparent for some time.

There are a couple of slots milled into the plywood ladder labeled 'scribe center' with a marker.  The slots are not in the photos that come with the methods, nor is there any description of what 'scribe center' means.  I screwed in a couple of 18 inch or so long pieces of 2x4 that I had in the shop parallel to the edge of the ladder.  They're the white pieces in the photo below. The ladder at this end has a 30 degree or so angle.  You can see the slot milled into the far side ladder piece in the photo below.  It's right about the 2x6 and angled up towards the stern.  I used a couple of clamps to hold the 2x4's in place, predrilled, and then set the screws.  Then I put a flat piece of plywood at the base of the slot.  (at least I think it was the base -- my photos are terrible and my memory worse).  Anyways I then laid the transom on the flat piece of plywood and used a couple of deep C-clamps to hold the transom to the 2x4's.  I checked that the transom was centered with a plumb bob.  I did my best to sight down the lines to make sure all is well and fare.  I will re-check this tonight with a long batten.  I'm confident I am where I want the transom wrt to the hog and keel, but in retrospect did not check that the edges supporting chines are parallel.  I'll do that tonight before I start working on trimming the stem.


The transom attached to the form.  I attached it to the 2x4s with a couple of countersunk #8 screws on each side.


Monday, December 15, 2014

On to the transom

15 December 2014.

I glued up the two pieces of the transom last night.  I used three West System squirts for each half.  It was about 50 degrees in the shop, so it went on a bit thick.  I cured it in a warmer room - around 60-65 overnight.  In addition to all these clamps on the edges I also put a dozen or so screws into the middle. I used 3/4 inch #8 screws and took the time to counter sink them so I would not end up with ragged edge.  Probably overkill wrt to the clamping and the screws.  I conveniently put the side with the pre-etched centering marks inside the sandwich.  Doh!


  The countersunk screws and a bucket of heavy C-clamps.


I cleaned the squeeze out from the region where the hog and chines will intersect.  I don't think the squeeze out adds much strength and a clean line will make for an easier fit later on.  That is the theory anyways.


Here is a picture of the glued up inner stem.  I added a foot ruler for scale, as I was surprised at how small this piece was relative to my expectations after reading the instructions.  It now needs to get ground down.


Tuesday, December 9, 2014

Full stem ahead

9 December 2014

A small but important milestone last night.  The first piece of the boat, the inner stem, was glued up.  The temp in the shop was ~45, so the epoxy was thick.  It went on a little heavier than I wanted and squeeze out made a bigger mess than I was expecting.  I left it over night in a warmer room.  The set up looked fine at 6:30 this AM.


The next task will be to grind down the inner stem to the shape outlined in Doug's plans (see below).  A blow up of the intended cross-sectional profile is below.  Plenty of opportunity to screw up on the horizon.....  Should be fun.  I will try my new angle grinder.  Always fun to figure out a new tool.


Sunday, December 7, 2014

Lock down

7 December 2014


Spent my Sunday finishing the ladder, cleaning up of the shop, and locking all the ladder, forms, and horses to the floor.  First job today was adding the stern and bow OSB frame/rail cross pieces.  I don't have a good picture of the end rails on the ladder, but they function to keep the ladder from racking and will provide support later on for the stem and transom.  They both need to get centered.  The aft one was straight forward.  I pulled a string down the center and then just dropped a plumb.  The one on the pointy end was trickier.  I attached the form with the scribed center lines facing aft.  Have to confess I am not sure if that what was intended or the consequences of the decision.  I transferred the lines the other side as best I could with a framing square and a pencil.  I also drilled a couple of small holes in the line with a small diameter bit.  Got everything aligned.  Put some clamps on.  Drilled 4-5 holes on each side and drove some 1 5/8 dry wall screws.  I attached a 2x1 oak strip under the bow ladder frame piece to make the ply a bit stiffer before I add the stem.  After checking that the frame pieces were square and ladder level in each section, I screwed the ladder to the horses and then screwed the horses to the floor (which in my case is just OSB; which has held up remarkably well for 15 years...).  That took a good hour or so.  The whole thing is one giant piece and should provide all the strength and resistance I need to bend the chine and other pieces.  After that I moved things around the shop so that I would have better access to the boat as we go forward.  That was another couple of hours, but time well spent.  I moved one of my ceiling mounted radiant heaters as well.  I can get the shop to ~60 when the outside temp is below freezing and the wind is howling.  I will need a better thermometer though.


On to the inner stem.  My first boat part!  First though I have to say that the frame and ladder went together very easily.  I had to spend some time getting the OSB frame parts to fit with some sand paper (and got my first good blister), but overall I am very happy to have spent the money on the precut pieces.  I'm way farther along than I would be (and spent much less time bewildered)  than I would if I had to lay everything out and build the frame.

The inner stem pieces are rough cut on one sheet.  I cut them out with the jigsaw.  I cleaned them up a little, but much as a substantial fraction will get ground away.  I bought a angle grinder last night in expectation of using it on the stem and on the hog.


The other inner stem parts.  The transom at the top of the photo.  Some nice tie dye remnants.


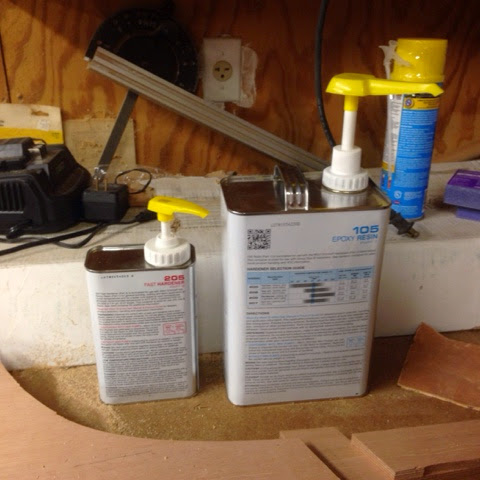
First glue up.  The temp in the shop was in the 50s.  Maybe 60.  So after priming the pumps I mixed a single shots of fast harder (205) and 105 and slathered the whole batch on a couple of pieces I had left from the inner stem sheet.  If they set up appropriately by tomorrow night I will glue up the stem.  I really wanted to tackle the stem tonight, but figured a test of the epoxy reagents was the smarter course.


Clamp, clamp, clamp.  Thankfully I have dozens.  My home made bench is made entirely of old wooden maple bench tops from renovated labs at the MBL in Woods Hole.  It weighs a few hundred pounds.  I started a little epoxy work spot in the corner of the shop.  I am thinking I will move it to another corner where I can provide some more ventilation.


Up and down the ladder

5 December 2014

Good progress Wednesday night.  It's taken until Friday though to catch up on blogging.  Ian, my 13 year old and fellow boat builder, pitched in Wednesday night.  The goal was to finish the ladder and perhaps start adding the pre-cut form pieces.  We got the first part done.


While we build the skiff, we are also building a hovercraft for Ian's Falmouth Academy Science Fair (always a big deal at FA).  He has made good progress to date.  The forecast is for a solid weekend of rain, so we should get the blower properly aligned and attached this weekend.


The picture below shows where we left things after 2 hours of work.  I had to replace one of the 12 foot 2x6's for the ladder due to excess cupping.  I believe the horses will just do wrt to the width of the ladder, but we might have to build out a broader top.  I assume I will more or less permanently fix the ladder to the horse, so I can get close to the edge.  We struggled a bit trying to figure out if the front face or the middle or the back face of the form should align with the 3', 6', etc. marks on the ladder.  After breaking out the square we decided that the plans called for the front face of each of the form pieces is on the mark.  We pre-drilled and screwed in the plywood pieces with just a couple of screws, so we'll be able to adjust them easily and get the whole thing straight and flat.


We aligned the bottom edge of the plywood pieces to the bottom of the 2x6's.  This lead to the last cut on the form, the one at the bow, to overlap the 2 by.  I cut a little of the 2x6 to make room.


I don't want to give away the plans of course, but I did want to show the scale and level of detail provided.  I think the scale is 1" to 1.5 foot.  That is a one foot rule on the plans.  Dough Hylan provides a dozen or so pages.  They're very clear (so far!) and well printed, even for my tired, old eyes.


This got turned upside down in the camera, but it shows you the level of detail on this sheet.


pretty much as we left on Wednesday night.  We promised ourselves that we would take a picture every time we did something on the skiff.  I made a little holder for camera.  May have adjust it a bit.  If all goes well, we'll be able to make a time lapse.  I also started an excel sheet to keep track of the time spent building.