7 December 2014
Spent my Sunday finishing the ladder, cleaning up of the shop, and locking all the ladder, forms, and horses to the floor. First job today was adding the stern and bow OSB frame/rail cross pieces. I don't have a good picture of the end rails on the ladder, but they function to keep the ladder from racking and will provide support later on for the stem and transom. They both need to get centered. The aft one was straight forward. I pulled a string down the center and then just dropped a plumb. The one on the pointy end was trickier. I attached the form with the scribed center lines facing aft. Have to confess I am not sure if that what was intended or the consequences of the decision. I transferred the lines the other side as best I could with a framing square and a pencil. I also drilled a couple of small holes in the line with a small diameter bit. Got everything aligned. Put some clamps on. Drilled 4-5 holes on each side and drove some 1 5/8 dry wall screws. I attached a 2x1 oak strip under the bow ladder frame piece to make the ply a bit stiffer before I add the stem. After checking that the frame pieces were square and ladder level in each section, I screwed the ladder to the horses and then screwed the horses to the floor (which in my case is just OSB; which has held up remarkably well for 15 years...). That took a good hour or so. The whole thing is one giant piece and should provide all the strength and resistance I need to bend the chine and other pieces. After that I moved things around the shop so that I would have better access to the boat as we go forward. That was another couple of hours, but time well spent. I moved one of my ceiling mounted radiant heaters as well. I can get the shop to ~60 when the outside temp is below freezing and the wind is howling. I will need a better thermometer though.
On to the inner stem. My first boat part! First though I have to say that the frame and ladder went together very easily. I had to spend some time getting the OSB frame parts to fit with some sand paper (and got my first good blister), but overall I am very happy to have spent the money on the precut pieces. I'm way farther along than I would be (and spent much less time bewildered) than I would if I had to lay everything out and build the frame.
The inner stem pieces are rough cut on one sheet. I cut them out with the jigsaw. I cleaned them up a little, but much as a substantial fraction will get ground away. I bought a angle grinder last night in expectation of using it on the stem and on the hog.

The other inner stem parts. The transom at the top of the photo. Some nice tie dye remnants.

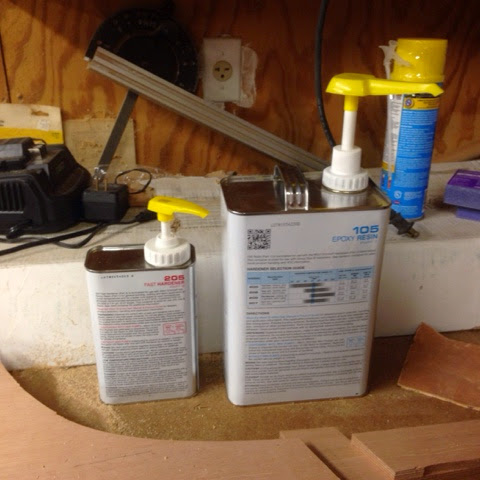
First glue up. The temp in the shop was in the 50s. Maybe 60. So after priming the pumps I mixed a single shots of fast harder (205) and 105 and slathered the whole batch on a couple of pieces I had left from the inner stem sheet. If they set up appropriately by tomorrow night I will glue up the stem. I really wanted to tackle the stem tonight, but figured a test of the epoxy reagents was the smarter course.

Clamp, clamp, clamp. Thankfully I have dozens. My home made bench is made entirely of old wooden maple bench tops from renovated labs at the MBL in Woods Hole. It weighs a few hundred pounds. I started a little epoxy work spot in the corner of the shop. I am thinking I will move it to another corner where I can provide some more ventilation.


No comments:
Post a Comment